Visual Studio Code Tasks
If you haven’t heard about or used VS Code Tasks yet then it’s about damn time you do. This feature feels like it has been there forever but very few people know that it even exists. So let’s dive in and explore what tasks are and how to use and configure them in VS Code.
What are Tasks exactly?
In most dev environments you have lots of tools you need to run many times during your day to build, lint, format, package, test, run your servers or what ever it may be. These tools are mostly run from the command line.
Tasks in VS Code can be configured to run scripts and start processes from within VS Code without having to enter a command line. You can even run multiple commands simultaneously by just running a custom task.
But how do you actually run these glorious Tasks now?
Task auto-detection
VS Code has a feature to auto-detect tasks configured in your workspace. For JavaScript/TypeScript projects that is achieved by analysing your package.json, which most likely already has most of the tools configured you need to run.
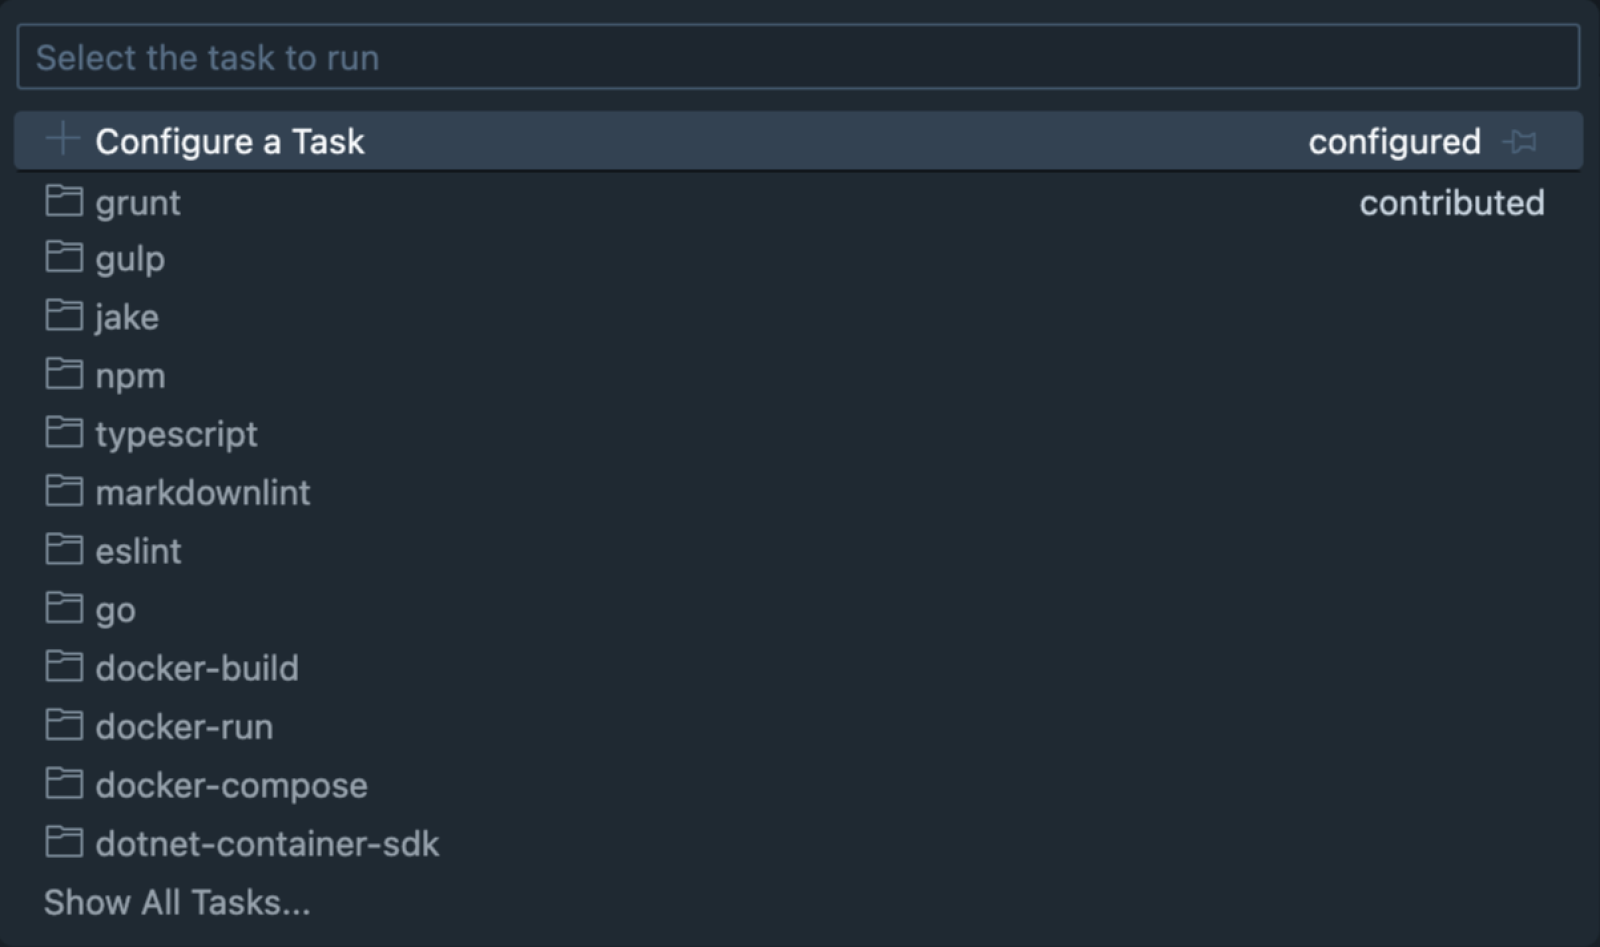
To see and run the auto-detected Tasks, simply open up your command palette with Command/Ctrl Shift p and type in run task. Select the option that says Tasks: Run Task.

This will open up a menu showing all the different tools that VS Code can auto-detect.

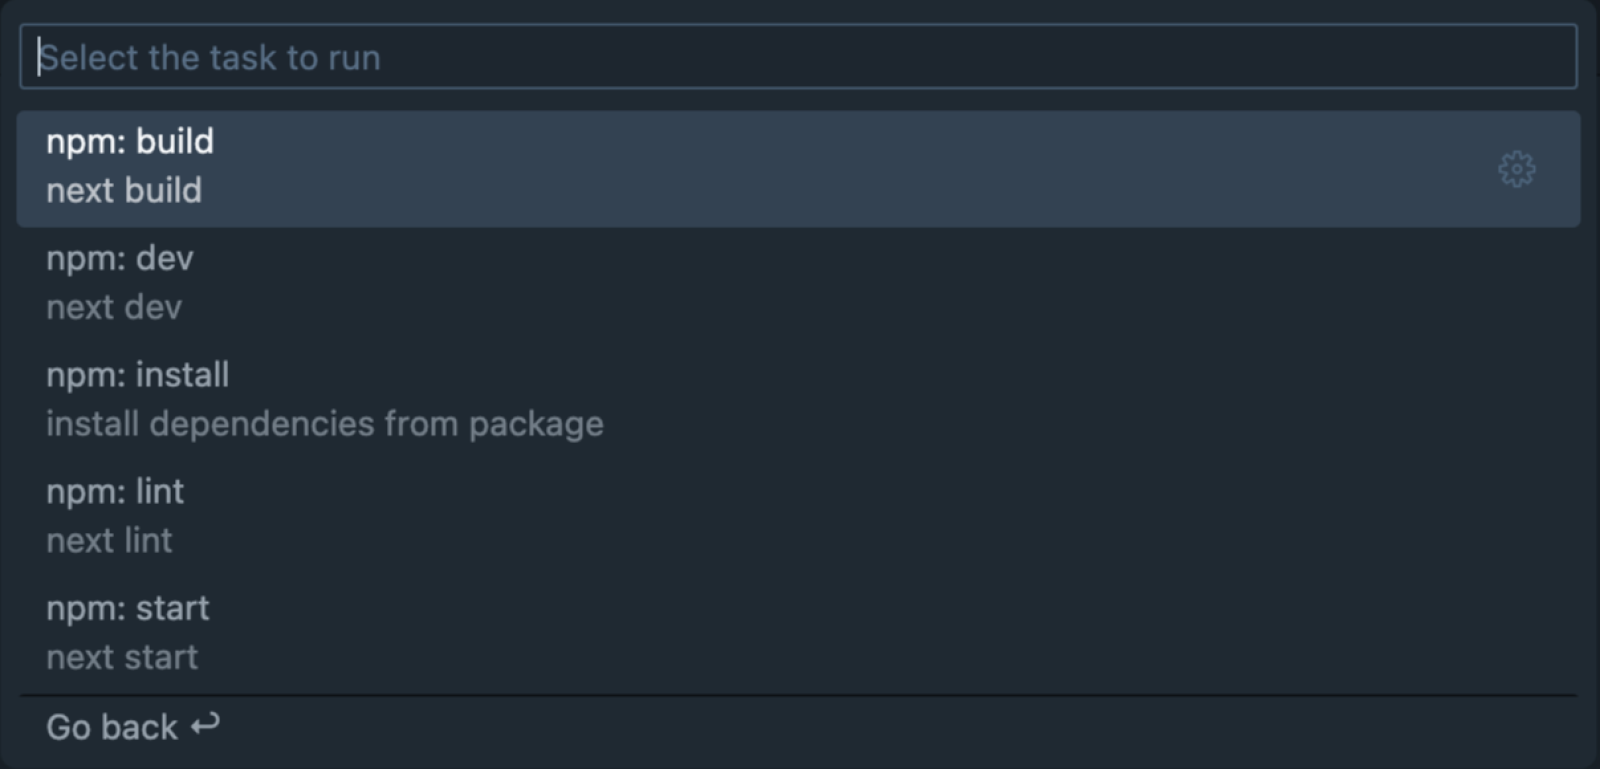
Since I use a freshly setup Next.js repo for this demonstration I will choose npm to list all available commands. Then I’m presented with this view:

I selected the npm: dev option to start my development server and automagically VS Code opened up a terminal with the command already executing. In the upper right corner it even added a proper label for the currently running task.

This is already very handy but sometimes you are just a bit fancier than that, aren’t you. As promised Tasks are also capable of running all kinds of commands. Custom Tasks to the rescue!
Custom Tasks
There are many options you can add to the task configuration and we will explore some of them but the official VS Code tasks docs is the best place to learn more about all the available options.
With that out of the way let’s recreate the auto-detected task from earlier with a custom defined task to start things off easy.
One Task at a time
First create a .vscode directory inside the root of your project. Then add a tasks.json file to that. Inside of it we will add the most basic config to create a custom task for a JavaScript project.
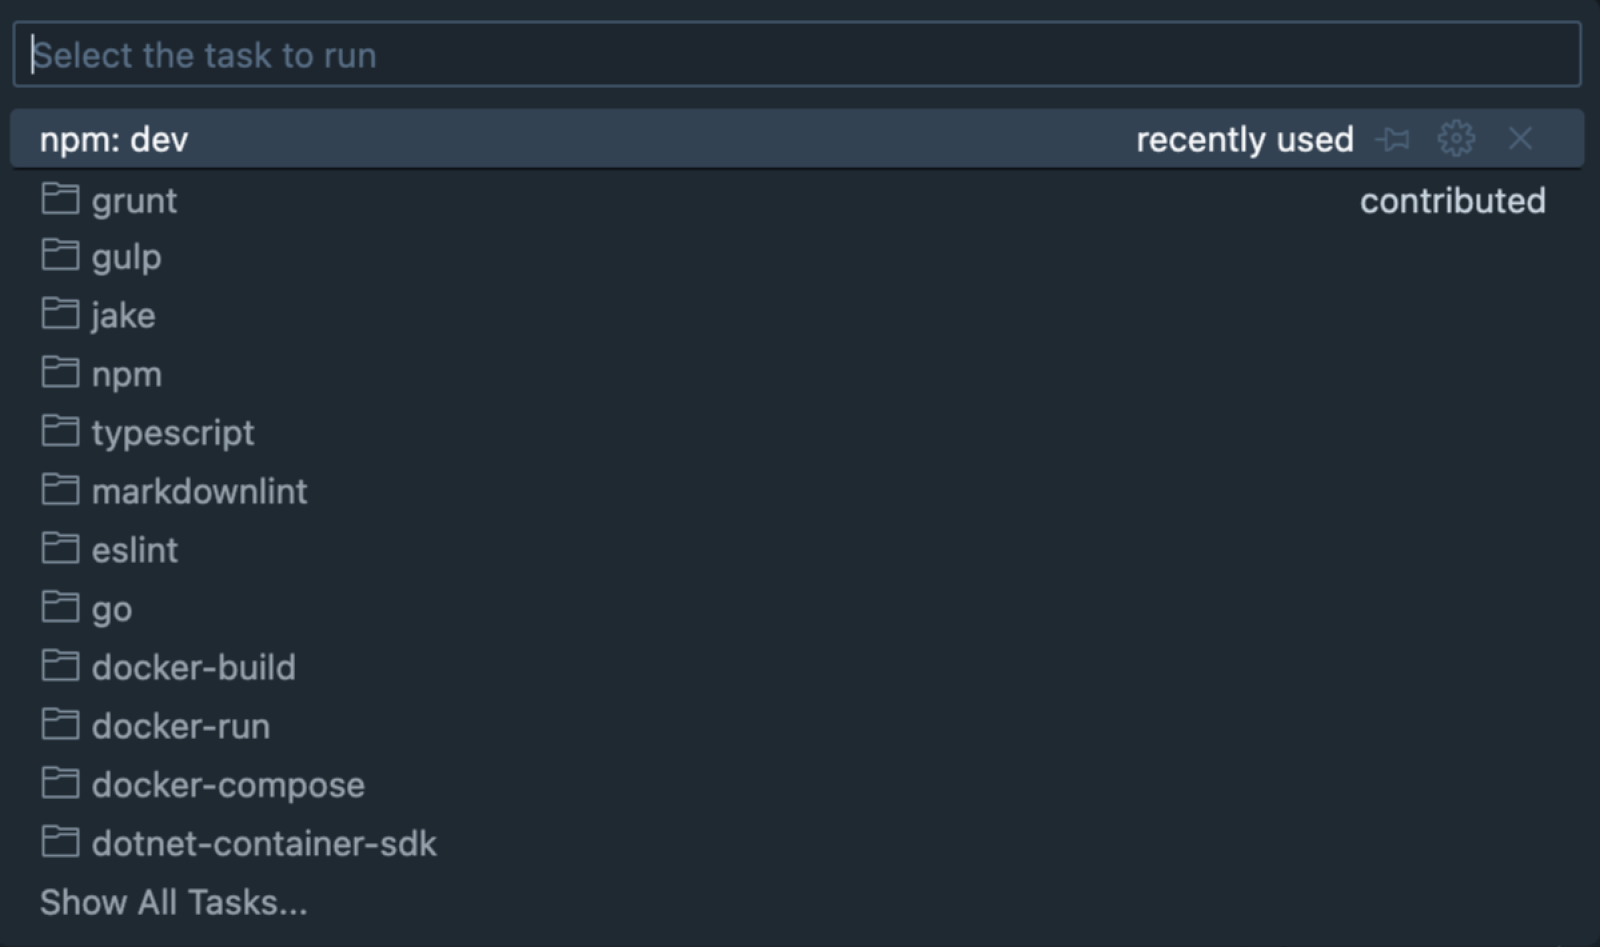
1{2 "version": "2.0.0",3 "tasks": [4 {5 "type": "npm",6 "script": "dev"7 }8 ]9}Now if we open up the command palette again and select Tasks: Run Task we can see our newly created task right at the top.

That name is not very descriptive so we should add a custom label and a description to more easily identify our tasks.
1{ 2 "version": "2.0.0", 3 "tasks": [ 4 { 5 "type": "npm", 6 "script": "dev", 7 "label": "Web Dev Server", 8 "detail": "Start the web dev server", 9 }10 ]11}
That’s much nicer already. Now when I start the task the terminal opens up with the task running … but actually I don’t want to see the terminal until an error comes up. Thankfully we can also control this behaviour with the presentation property. With these settings we can modify the behaviour of the terminal in which the task will run in.
The updated tasks.json file looks like this:
1{ 2 "version": "2.0.0", 3 "tasks": [ 4 { 5 ... 6 "presentation": { 7 "reveal": "silent", 8 "panel": "dedicated" 9 }10 }11 ]12}I have added the reveal and panel settings inside presentation . Reveal controls whether the terminal should open up or not. Setting it to silent means that it should only open up if an error is detected or the command failed executing. panel sets where the command should run in. Setting it to dedicated tells VS Code to run this task in a separate terminal instance and not share the terminal with other tasks but the same task will run in the same terminal if it was used before.
However after some testing you will surely find that the terminal is not opening up when an error is shown. Instead the terminal only opens up when the process exited with an error code. Which kinda makes sense since it’s very hard to guess how error messages will look like in the task you have specified yourself. This is why we have to explicitly tell VS Code how our errors could look like. For this we have to specify a problemMatcher .
VS Code has some built in pre defined problem matchers available to use but you could also define a custom problem matcher yourself. However to keep complexity low I will not go into this topic in this tutorial. Check the VS Code docs linked to learn more about this topic if you are interested.
Anyway let’s add a problemMatcher to our config to better notice when something goes wrong.
1{2 "version": "2.0.0",3 "tasks": [4 {5 ...6 "problemMatcher": ["$tsc-watch"],7 }8 ]9}For this demo I will use the tsc-watch matcher since I us Next.js with TypeScript. Keep in mind that this is very depending on your project and you might have to add different or more problem matchers to your config. Also still check your terminal from time to time manually since there still might be some errors that don’t get detected by VS Code.
You might ask yourself how tasks are any useful when you have a billion tools to start before you can start developing. Starting a billion tasks won’t help much. That is true but tasks have a super power I haven’t told you yet. You can create tasks that depend on other tasks.
One task to rule them all
Yes, I had to make that reference (I’m a nerd after all). Jokes aside, now it’s time to have a look on how we can write tasks that work together to create a glorious dev experience in your projects. After all we want one task to start up all our tools and dev pipeline.
For this demonstration I have storybook setup in my Next.js project and I want to start the next dev server and storybook server at the same time when developing.
First let’s create the task to start storybook. I’ve added a script to package.json that has the command to start the storybook dev server which I’m going to call in this task.
1{ 2 "version": "2.0.0", 3 "tasks": [ 4 ... 5 { 6 "type": "npm", 7 "script": "storybook", 8 "label": "Storybook Dev Server", 9 "detail": "Start the storybook dev server",10 "problemMatcher": ["$tsc-watch"],11 "presentation": {12 "reveal": "silent",13 "panel": "dedicated"14 }15 }16 ]17}Now we have two tasks in our config. One to start the Next.js dev server and one to start the Storybook dev server.
As a side note - you can also use any shell command you want to run as a task. For that just switch out the type from npm to shell and instead of adding the script setting, replace it with command and type in your shell command as a string.
Anyway, let’s add a third task that puts it all together and calls the two other task we have just defined.
1{ 2 "version": "2.0.0", 3 "tasks": [ 4 ... 5 { 6 "label": "Development", 7 "detail": "Start all tools for development", 8 "dependsOn": ["Web Dev Server", "Storybook Dev Server"], 9 "problemMatcher": []10 }11 ]12}Notice the key difference to the other tasks. For this we only really need the dependsOn setting which tells VS Code which tasks this task depends on (hence the name - duh). Inside the array of dependsOn you have to put in the label you added to the other tasks. Then I’ve also added a label and detail to this third task to be able to identify it. And I’ve also added an empty problemMatcher array to tell VS Code that this task, on it’s own, has no errors to watch out for.
Now let’s open up the command palette one last time and select Tasks: Run Task . Here you can now see all of our defined tasks including the Development task we just added.

Let’s select it and see what happens. At first nothing much. Remember, we set the terminal to only open up when there is an error but notice the icon in the bottom bar in VS Code.

There is now a new icon there with the number two. If you click on it then the internal terminal will open up where you can see your two tasks running with all the usual server logs.

It even labeled the terminals according to our settings. How cool is that?!
That’s cool and all buuuuut it’s still a tiny bit tedious to open up the command pallet and navigate to the Tasks: Run Task view and select the task to run. Can we do even better?
Keyboard shortcuts
Jup, your lazy fingers can move even less to achieve the same thing. In VS Code there is a pre configured keyboard shortcut to run the “default build task”. All you need to do, to bind one of your tasks to this keybinding, is to add the following settings to one task.
1{ 2 "version": "2.0.0", 3 "tasks": [ 4 { 5 ... 6 "group": { 7 "kind": "build", 8 "isDefault": true 9 }10 }11 ]12}With that set you can now press Command/Ctrl Shift b and your task will start executing just as before.
You can even define custom keyboard shortcuts to run any task you want but check out the docs yourself to learn more about this. I’m done for now.
Final tasks.json file
If you followed along, your final file should look something like down below.
Thank you for sticking around until the end. I hope you liked it. I know I did and I hope you check out one of our other articles. See you next time.
1{ 2 "version": "2.0.0", 3 "tasks": [ 4 { 5 "type": "npm", 6 "script": "dev", 7 "label": "Web Dev Server", 8 "detail": "Start the web dev server", 9 "problemMatcher": ["$tsc-watch"],10 "presentation": {11 "reveal": "silent",12 "panel": "dedicated"13 }14 },15 {16 "type": "npm",17 "script": "storybook",18 "label": "Storybook Dev Server",19 "detail": "Start the storybook dev server",20 "problemMatcher": ["$tsc-watch"],21 "presentation": {22 "reveal": "silent",23 "panel": "dedicated"24 }25 },26 {27 "label": "Development",28 "detail": "Start all tools for development",29 "dependsOn": ["Web Dev Server", "Storybook Dev Server"],30 "problemMatcher": [],31 "group": {32 "kind": "build",33 "isDefault": true34 }35 }36 ]37}